Power Up Your WordPress Customizer With Inspect Element
The WordPress Customizer is (as the name implies) a built-in WordPress tool that helps customize different parts of your WordPress site.
What Is The WordPress Customizer
While it is helpful and straightforward to use, it is very limited in what it can do.
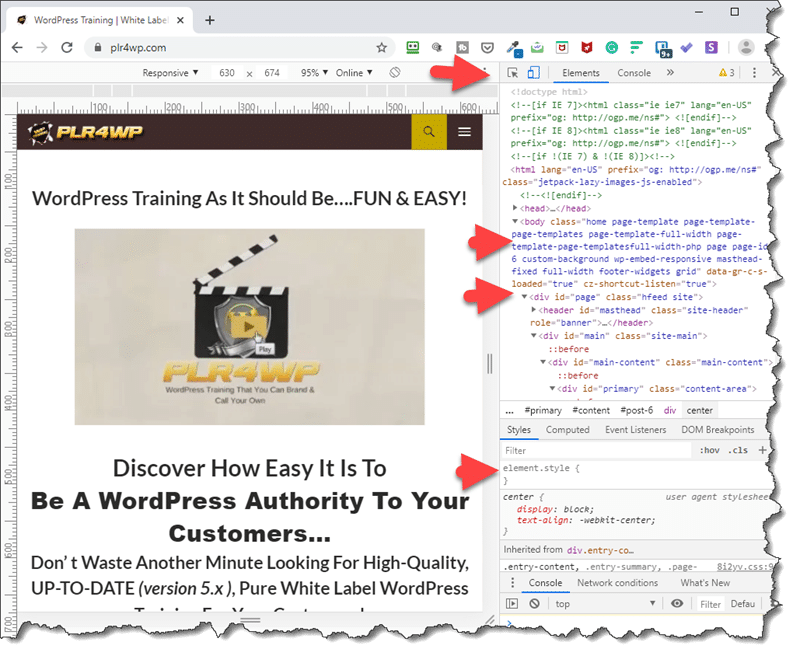
Chances are pretty good that you are reading this inside of a web browser. Most browsers these days have a built-in tool that lets you see & inspect the source code of that site you are on.
Depending on the browser, this tool may be called Inspect (Chrome) or Inspect Element.
NOTE: The first time you look for this in Microsoft Edge, you’ll first need to use the F12 key along the top row of your keyboard.
To access this power-tool, go to your WordPress site (or any website) and right-click on it. Then usually close to the bottom of your context menu will be the option for Element or Inspect Element.
Left-click, then a separate pane opens. Here is a goldmine of knowledge for a Developer or a bunch of gibberish for most anyone else that has never seen the source code of a web site before.

Here you can make changes to the source code and
see in real-time what that change looks like WITHOUT messing up the site – even if it is not your site.
Here is a quick example of me changing the USA Todays Headline:
Okay so that was fun but seriously though, my point is that you can make on-the-fly edits using the free tools hidden in your browser.
“Neat Trick But I’m Busy – Why Should I Learn This Tool“
There a loads more things you can do with this Inspect tool.
You can see what your (or any) website looks like on different devices. What SEO keywords a site is targeting.
Maybe you want to see if your site is loading too slow if you use the Google PageSpeed test.
Maybe as a content creator, you get tired of blurring out yours or others’ email addresses and names that find their way onto your screenshots. As I demonstrated in the mini-video above, you can first pull up your screenshot area, use Inspect Element and remove the text altogether. Then take the screenshot.
Quicker and looks better.
Maybe doing the email back & forth trying to describe to a Support Agent what and/or where the problem is on your site. With Inspect Element, you can show them much more easily while saving a ton of time in the process.
Maybe you want to see what your header would look like with a shade of blue instead of that hideous pink.
I am not judging. Okay, maybe a little.
These are just a few of the things this free tool can do for you.
Here is a link to a guide from Lifewire. It mainly shows ways to access the tool within different browsers.
https://www.lifewire.com/get-inspect-element-tool-for-browser-756549
Another option is to use your favorite search engine.
Search the phrase “how to use inspect element” if you leave in the quotation marks, you will narrow the search.
The main reason I wanted to point out the power of the Instepct Element browser tool, is that any changes you make with it using CSS, you can copy that CSS code and paste it in the Additional CSS section in the WordPress Customizer as I showed in videos 31, 32 & 33 in PLR4WP Volume 14. </shamless self-promoting plug>
The WordPress Customizer is a great tool but remember the Inspect Element tool is there to help when you need it.
Comment below if you have used Inspect Element and maybe a little about what you used it for.
Steve Dougherty


